
Register a customer in Brazil
Use this guide before preparing a quotation for a new customer. At the end, you will have a contact record with identification, contact details, and addresses.
Before you start
Have permission to create contacts and check which company is active in Odoo.
Have the customer’s confirmed name, CPF or CNPJ, address, and contact details available.
The Brazilian fields described here require the OCA Brazilian localization in your environment.
1. Check whether the customer already exists
Open and search for the customer’s name or CPF/CNPJ. If the record exists, open it and check the details before creating another record.
2. Create the contact and identify the customer
Click Create (or New, depending on the installed interface). Choose Company for a company or Individual for a person. Enter the name used to identify the customer in the system.
In the Brazilian fields, enter the company’s legal name or the person’s full name, and the corresponding CNPJ or CPF. Keep the identification consistent with the customer type. Labels may vary with your environment’s language and configuration.
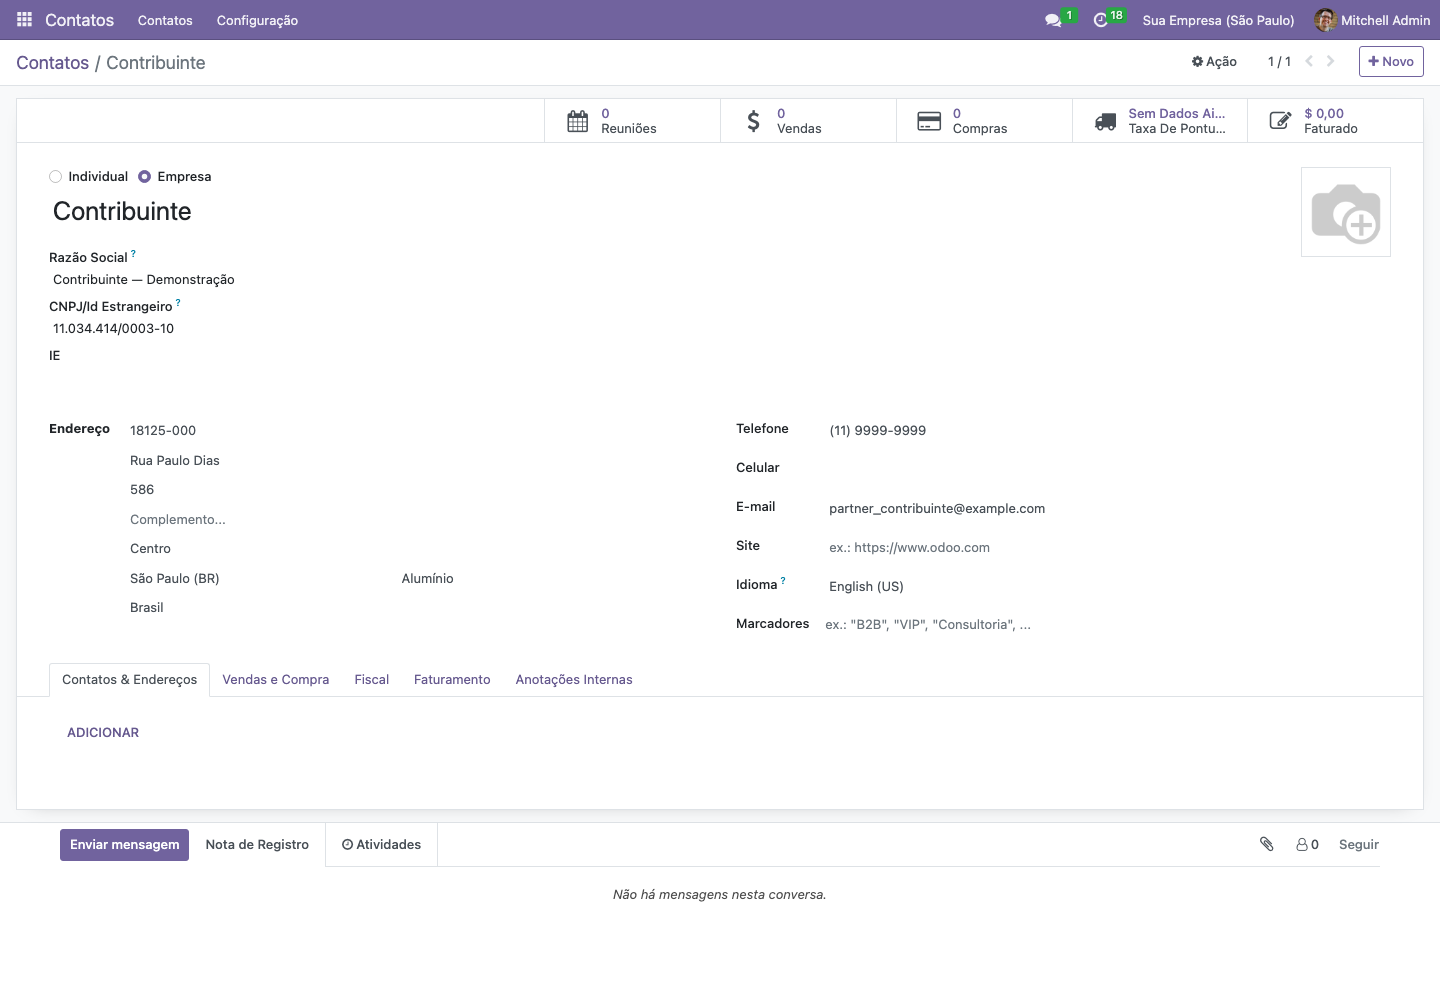
Example named Contribuinte — Odoo 16, Portuguese interface, KMEE demo captured on 16 September 2026. Complete the required data in your own record; the demo has blank fields.
3. Check the address and fiscal identification
Set the country and complete the address, including postal code, street, number, city, and state. Check the information supplied by the customer.
Fill in the state registration and other applicable fiscal information using the customer’s records and your fiscal team’s instructions. Do not infer a fiscal classification merely to complete the form.
The examples use the names Contribuinte and Não contribuinte for customers recorded as ICMS taxpayers and non-taxpayers, respectively. Confirm the applicable classification with your fiscal team; the customer’s name does not set it.
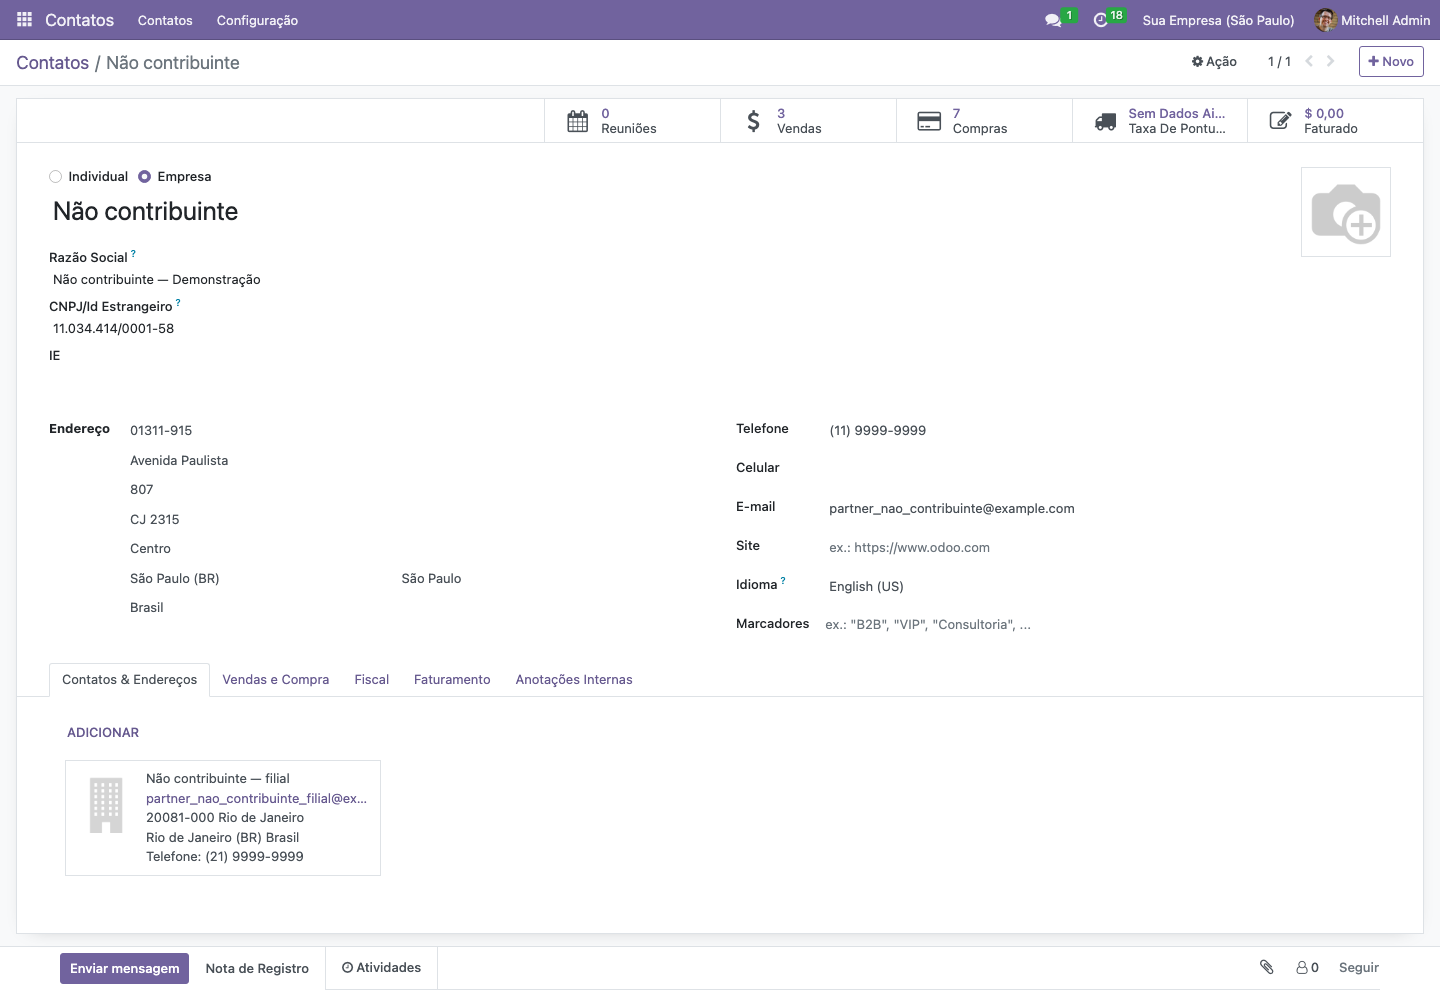
Example named Não contribuinte — Odoo 16, Portuguese interface, KMEE demo captured on 16 September 2026. This is also the customer used in the quotation example.
4. Add billing and delivery addresses
If billing or delivery uses another address, open Contacts & Addresses and click Add. Select Invoice Address or Delivery Address, fill in the details, and click Save & Close.
5. Complete the commercial details and check the record
Enter the email address and phone number used for communication. Choose the contact’s language when documents or messages should use a specific language.
If the Sales & Purchases tab is available, check the salesperson, payment terms, and pricelist agreed with the customer. Confirm that the record has been saved, then find and reopen it in the contact list.
Expected result
The customer can be found in Contacts and selected when preparing a quotation. The saved addresses can be used for billing and delivery.
If something goes wrong
Rejected CPF/CNPJ: check the number, customer type, and country against the confirmed customer data.
Duplicate record: search for the existing contact and check whether it represents the same customer.
Missing Brazilian fields or editing access: ask the administrator to check the localization, company configuration, and your permissions.
Next step
Continue with Prepare a quotation and confirm a sales order.