
Flujo estándar de Odoo. Consulte también el procedimiento KMEE para los módulos brasileños.
Facturación electrónica (EDI)
EDI, o intercambio electrónico de datos, es la comunicación entre empresas de documentos empresariales, como órdenes de compra y facturas, en formato estándar. Si envía documentos que cumplen con el estándar EDI se podrá asegurar de que la máquina que reciba el mensaje podrá interpretar la información de manera correcta. Hay muchos formatos EDI que están disponibles dependiendo del país de su empresa.
La función EDI permite automatizar la administración entre empresas, además de que es posible que algunos gobiernos lo pidan para facilitar el control fiscal y la administración
Uno de los usos de EDI es que podrá crear facturas y notas de crédito en formato electrónico.
Los siguientes formatos, entre otros, son compatibles con Odoo.
Nombre de Formato |
Aplicación |
|---|---|
Factur-X (PDF/A-3) |
Para las empresas de Francia y Alemania |
Peppol BIS Billing 3.0 (UBL BIS Billing 3.0) |
Para empresas que están en países que están dentro de la lista EAS |
E-FFF |
Para empresas de Bélgica |
XRechnung (UBL) |
Para las empresas de Alemania |
Fattura PA (IT) |
Para las empresas de Italia |
CFDI (4.0) |
Para las empresas de México |
Perú UBL 2.1 |
Para las empresas de Perú |
SII IVA Llevanza de libros registro (ES) |
Para las empresas de España |
UBL 2.1 (Colombia) |
Para las empresas de Colombia |
Autoridad fiscal de Egipto |
Para empresas egipcias |
E-Invoice (IN) |
Para las empresas de India |
NLCIUS (Países Bajos) |
Para empresas neerlandesas |
EHF 3.0 |
Para empresas noruegas |
Facturación SG BIS 3.0 |
Para empresas singapurenses |
A-NZ BIS Billing 3.0 |
Para empresas australianas o neozelandesas |
Peppol |
For Peppol |
Ver también
Fiscal localizations
Configuración
Vaya a y active los formatos que necesita para este diario.
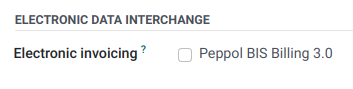
Después de que active el formato de facturación electrónica, se generarán los documentos XML cuando haga clic en el botón Confirmar que está en los documentos como facturas, notas de crédito, etc. Podrá encontrar estos documentos en la sección de archivos adjuntos o incrustados en el PDF.
Nota
Para el formato E-FFF, el archivo xml aparece solo después de generar el PDF (con el botón Imprimir o Enviar e imprimir), ya que el PDF necesita estar insertado en el xml.
Todo PDF generado desde Odoo contiene un archivo XML Factur-X (por motivos de interoperabilidad). Para empresas alemanas y francesas, la opción Factur-X (PDF/A-3) también activa las revisiones de validación en la factura y genera un archivo PDF/A-3. Este archivo es necesario para plataformas como Chorus Pro.
Los formatos disponibles dependen del país que está registrado en la Información general de la empresa.
Odoo es compatible con el formato Peppol BIS Billing 3.0 que se puede usar a través de puntos de acceso existentes.
Peppol
The Peppol network ensures the exchange of documents and information between companies and governmental authorities. It is primarily used for electronic invoicing, and its access points (connectors to the Peppol network) allow companies to send electronic documents such as customer invoices and credit notes and receive documents like vendor bills and refunds.
In this case, Odoo acts as both an access point and an SMP and enables electronic invoicing transactions without the need to send invoices or bills by email or post.
Nota
Make sure to install the Peppol module (
account_peppol).Peppol registration is free and available in Odoo Community.
Supported formats for sending documents include BIS Billing 3.0, XRechnung CIUS, and NLCIUS.
- The following countries are eligible for Peppol registration in Odoo:Andorra, Albania, Austria, Bosnia and Herzegovina, Belgium, Bulgaria, Switzerland, Cyprus, Czech Republic, Germany, Denmark, Estonia, Spain, Finland, France, United Kingdom, Greece, Croatia, Hungary, Ireland, Iceland, Italy, Liechtenstein, Lithuania, Luxembourg, Latvia, Monaco, Montenegro, North Macedonia, Malta, Netherlands, Norway, Poland, Portugal, Romania, Serbia, Sweden, Slovenia, Slovakia, San Marino, Turkey, Holy See (Vatican City State)
Registration
To register on Peppol, go to , scroll to the PEPPOL Electronic Document Invoicing section, and fill in the following information:
Peppol EAS: Peppol Electronic Address Scheme, which usually depends on the company’s country. This field is often prefilled with your country’s most commonly used EAS code. For example, the preferred EAS code for most companies in Belgium is
0208.Peppol Endpoint: usually a Company Registry number or a VAT number
Mobile Number, including the country code (e.g.,
+32in Belgium)Primary contact email
Ver también
Peppol endpoint - OpenPeppol eDEC Code Lists (open the «Participant Identifier Schemes» as HTML page)
Click Validate registration.
The registration should be automatically activated, and the Application status should be updated within a day.
Select another purchase journal in the Incoming Invoices Journal field if necessary.
All invoices can then be sent directly using Peppol.
Nota
To update the Primary contact email, modify it and click Update contact details.
If you are using an access point from a previous provider, make sure to deregister from it first, then register with your new access point, unless it’s Hermes (BOSA). If using Hermes (BOSA), no action is needed; the migration is handled automatically.
Truco
To manually trigger the scheduled action used to check the Peppol registration status, enable developer mode, open the Settings app, go to , and search for Peppol: update participant status. Open the scheduled action, then click Run Manually.
To try Peppol without sending real data, use the demo mode by setting the account_edi_proxy_client.demo system parameter to
demo. This has to be done before clicking Validate registration.For advanced testing on Peppol’s dedicated test network, use the test mode by setting the account_edi_proxy_client.demo system parameter to
test. This option is intended for experienced users only. This has to be done before clicking Validate registration.
Contact verification
Before sending an invoice to a contact using Peppol, make sure the contact is registered as a Peppol participant. To do so, follow these steps:
Go to and access the customer’s form.
In the Accounting tab, check the following information in the Electronic Invoicing section:
Format: BIS Billing 3.0, XRechnung CIUS, or NLCIUS.
Peppol e-address (EAS): Select the relevant EAS code in the dropdown list.
Peppol Endpoint: Enter the customer’s endpoint identifier.
Click Verify. Its Peppol endpoint validity is marked as Valid if the contact is found on the Peppol network.
Importante
While Odoo prefills both the EAS code and the endpoint number based on the information available for a contact, verifying these details with the contact is recommended.
Send invoices
To generate Peppol documents for invoices of a journal enable the EDI format called “Peppol” on the journal. This should have happened automatically for countries in which Peppol is used by installing the module. Then confirming an invoice will generate Peppol a document in the format selected on the partner during the contact verification.
Posted invoices to be sent via Peppol are marked as Ready to send in the invoice’s PEPPOL status field.
Nota
All invoices that are ready to be sent via Peppol can be viewed in the following ways:
In the Invoices list view, use the (adjust settings) button to add the PEPPOL status column or apply the Peppol Ready filter in the search bar.
In the Accounting dashboard, click Peppol ready invoices on the relevant sales journal.
To send the invoice to the customer via Peppol, click Send & Print on the confirmed invoice form. In the Send window, enable Send via PEPPOL options, then click Send & Print (or Send or Send (Peppol) or Print depending on which of the Print and Email options are selected).
Truco
Multiple invoices can also be sent in batches via Peppol by using the Invoices list view.
Once the invoices are sent via Peppol, their PEPPOL status is changed to Processing.
The status is updated to Done once the invoices have been successfully delivered to the contact’s access point.
Truco
To manually trigger the scheduled action used to check the invoices” status, go to the Accounting dashboard and click Fetch Peppol invoice status on the corresponding sales journal.
Receive vendor bills
New documents received via Peppol are checked multiple times a day. Received documents are automatically imported into the purchase journal set in the PEPPOL Electronic Document Invoicing section, and corresponding vendor bills are created as drafts and appear in the vendor bills list view.
Truco
To manually trigger the scheduled action to retrieve incoming Peppol documents, go to the Accounting dashboard and click Fetch from Peppol on the main Peppol purchase journal.
Peppol deregistration from Odoo
Only one Peppol receiver registration can be active for each Peppol endpoint identifier at a time. To stop using Odoo as the Peppol access point, e.g., to switch to another provider or reconfigure the registration for a new database, you must first deregister from Peppol. To do so, go to , scroll down to the PEPPOL Electronic Invoicing section, and click Deregister from Peppol.
Once removed, the Peppol registration is deleted from the database, and documents can no longer be sent or received via Peppol in Odoo.